It’s time for another installment in my Junk Mail Paper series! In the first post, I showed you the simplest version of how to recycle your junk mail and unwanted paper into new paper .
 (If you missed the first post, you can find it HERE.)
If any of you actually tried this, I would LOVE to hear about it or see pictures! Share them in the comments!
Now I’m going to show you one of the things you can do with your new paper – making easy-tear notepads out of it! I also have a fun reusable notepad holder to show you!

Isn’t it cute? Let’s get started!
The Supplies

For the Notepad
1. Homemade junk mail paper (not pictured)
2. Paper cutter or scissors (not pictured)
3. Chipboard
4. Wide Painter’s Tape
5. Two pieces of wood that are taller and wider than your paper and at least a half inch deep.
6. 2 four inch C-clamps (not pictured)
7. Clear 100% silicone sealant – for window/door/attic
8. Magnetic tape or button (optional)
For the Holder
1. DIY 5×7 Chippendale Frame from Oriental Trading Company
2. Scrapbook paper
3. Mod Podge
4. Paint
5. 1 magnetic button
6. 1 small washer
7. Hot glue and gun
8. Sand paper (optional)
9. Primer (optional)
The Directions

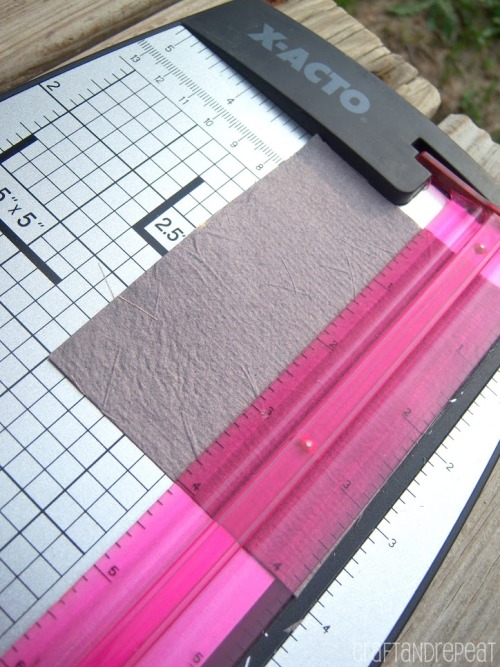
Start by trimming each piece of your homemade junk mail paper to the same size. Make sure you flattened it first by following my instructions in Part 1. If you have some pieces with worse deckle edges or more uneven edges than the other sides, trim those sides first. Save those trimmed edges to recycle into more paper! My paper has been trimmed to 3×4 inches. By the way, I FINALLY found my paper cutter! Yay! You might remember me talking about how frustrated I was about not being able to find it for 2 years in a previous post. Anyway…
Also trim a piece of chipboard to the same size. I have actual chipboard. T, my hubby, brought home a HUGE box a few years ago from work, and I still haven’t gone through the whole thing. I LOVE free stuff! You could easily cut out a piece from a cereal box or other similar food box.

To assemble and make the notepad, first cover the edge of each board with Painter’s tape. It should generously cover around each edge, touching 3 sides, like the picture shows. I used shelf inserts from our TV stand for this. Get creative! You don’t have to go buy wood scraps to do this!
You need to carefully stack your paper and chipboard. The chipboard serves as a sturdy backing for your notepad. I find it easier to add the chipboard last, but you might find it easier to start with it. If you’re recycling a food box to use as chipboard make sure the printed side is facing up and you stack the paper on top of it to hide the print.
To stack the paper, carefully line up each edge that will be at the top of the notepad. If a piece lays lower than the rest, it won’t be touched by the glue and will just fall out. I suggest doing it piece by piece and not just tapping the stack on a table to get them even. Pinch the top of the notepad tightly so the papers won’t slip, line it up with the taped edge of one board, put the other board on top lining it up with the paper and first board, and then tightly secure the C-clamps around everything (use the picture above as a guide). Make sure your paper didn’t move while you put the clamps on. It needs to be as straight as possible.
There are lots of different glues you can use to secure your notepad, but I’ve found that I really like the clear 100% silicone sealant the best! It creates a nice thick binding and the paper tears off so easily. It also doesn’t bleed into the paper like some other glues will. Apply 2-3 layers of glue to the top edge of your notepad. I like to wear a glove and apply it with my finger. Follow the manufacturer’s directions for drying. The Painter’s tape will protect your boards from glue and keep the notepad from sticking.

This is the only picture I could find of one of the notepads I’ve made in the past. This one was a gift for my mom a few Christmases ago. It has varying Christmas themed paper and a magnet on the back. You can add a magnetic button or piece of magnetic tape to the back of yours to stick it up on your refrigerator. However, if you want to make a notepad holder, don’t add a magnet, and keep reading!

Oriental Trading Company let me pick out some items for review, and I just HAD to have this DIY 5×7 Chippendale Frame! It comes unfinished, so there are so many crafty things you could do with it! It also come in an 8×10 size. I started by disassembling the frame. There are 3 inner pieces: the glass, the chipboard, and the filler paper.

Then I just painted the frame in Canary Yellow. You could sand and prime it first, but I wanted some of the wood grain to show through. A helpful tip to keep paint from getting all over the edges of your can is to put a piece of Painter’s Tape over the top and wipe your brush on that instead of the edge of the can! Neat, huh?!

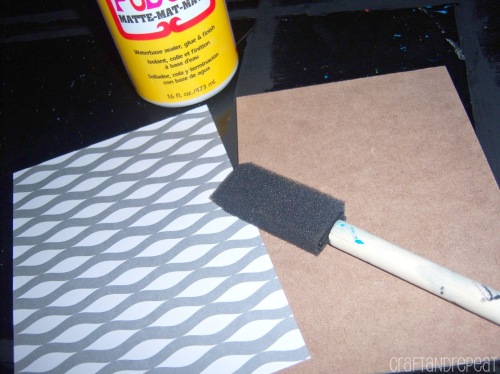
I cut a piece of scrapbook paper to the size of the chipboard that came with the frame and glued it to the chipboard with Mod Podge. The paper I used is part of the Black and White Monochromatic Paper Pack from Oriental Trading Company. I love the variety in this pack. If you scroll back up to the supplies picture, you can see the designs it comes with. I especially love the music themed paper! This pack is the standard 12×12 scrapbooking size. They have MANY other paper designs and paper packs besides this one. Can you tell my foam brushes get a lot of use?!

How you reassemble the frame is up to you, BUT I chose to layer it with the glass on the bottom, the paper in the middle, and the chipboard with the scrapbook paper showing on top. You can reuse your frame by layering it this way. You will be gluing something to the top layer. So if you don’t put the glass on top, you save it from the glue and can use it as a regular frame in the future. I didn’t want a shiny front for mine either, which is also why I chose to layer it this way. You need to put all the layers in there to make it nice and snug.

Use hot glue to attach the washer to the notepad and the magnetic button to the scrapbook paper. Don’t do it the other way around. This is what makes it reusable. It is A LOT cheaper to add a new washer than a magnet to a new notepad. You might even be able to reuse the chipboard backing if you carefully pull off the remaining glue!

Embellish your paper and frame! I made simple paper roses out of the scrapbook paper and stamped “notes” onto the bottom of my paper pad.

I also used Mod Podge to line the edges with the same scrapbook paper. I know some people think the gray and yellow combination has been overdone, but this is my first time using those colors together! I couldn’t resist! 🙂 I even put yellow thread in the paper to give it a little more character.

That’s it! You now have a cute reusable notepad holder with a homemade notepad! Even better, these frames come with attached hanging hardware and can be hung vertically or horizontally.

If you haven’t heard of Oriental Trading Company before, a visit to their site will definitely be worth your time! Everything is affordable, and they have a Lowest Price Guarantee.
Here are some great links to get you started:
1. Shop OTC
2. Sign up for email savings
3. Request a free catalog
4. Sign up for Oriental Trading Rewards
5. Explore free project ideas
**This post is sponsored by Oriental Trading Company. I received a gift card to put toward products for review. No other compensation was received. All opinions and reviews are written with complete honesty. The entirety of this post is comprised of my own thoughts and words.**
Remember, if you post about this project, please be sure to give me credit and link back to me or grab a button from the sidebar. Thanks!
Your opinions and thoughts mean a lot to me. I would love for you to leave me a comment below. Thanks for stopping by today!


This is fantastic! Love it so much. Be sure to share it with us on our Tuesday
BeBetsy Brag About It party!
So impressed – no have to go read Part I to get all the details of creating the paper. Thanks for the inspiration!
Follow us:
Facebook ~ Twitter ~ Bloglovin ~ Pinterest
It should read – now have to go read…… dumb fingers (and brain) 🙂
This is too cute! I love the flowers!
What a great project! I love to recycle but sometimes have a hard time finding ways to recycle that are actually useful. Thanks for the post.
So beautiful – I love it!! Thanks for sharing at Project Inspire{d}! Pinned! Hope you can share more of your creativity at tonight’s party – 8 pm EST http://www.settingforfour.com
Pingback: Two Girls and a Party {Link Up #23} | Life With The Crust Cut OffLife With The Crust Cut Off